Thursday, August 4, 2011

Facebook Networking

I did a couple of sessions over the past week. My niece came into town and I did a session for her and the girls. I also did a shoot of my daughter Ava in a new knot dress I bought for photo sessions and an adorable vintage hair piece. I absolutely love it and will be purchasing more kinda like it. Maybe a fascinator next! I also purchased some cute newborn hats for my friend's upcoming session. She's expecting her little one any day! I got an elf hat and a monkey hat and I knitted a baby pod and blanket to use for the session as well. I'm hoping to visit IKEA this weekend to pick up one of their Ophelia throws as well. I joined 2 sites on facebook that are very helpful, I think, for small businesses. One is "Promote Your Page Here" and the other is "Fan Page Promote". Businesses can network with other businesses and show support and it also provides potential vendors that you may need to purchase from later. I networked with a lot of fellow photographers and people who knit and make things that could be photography props. It benefits everyone involved and I highly recommend it!

Tuesday, July 19, 2011

What to Wear

To the left is this month's what to wear ensemble to give you some ideas how to tie together a look for your family portraits. Each outfit can be find at Gap, Old navy, or Piperlime. It's very important to tie a look together especially when you're spending money on getting portraits done, haircuts for the kids, new outfits for everyone. The yellow brings out just a "pop" of color to the theme. Hope you enjoy!

Monday, June 27, 2011

Maternity Session-SpokesMama

My good friend Tammie lives down the road from me in Fayetteville, NC. When I found out she was pregnant I knew I wanted to photograph her. Pregnant women are so beautiful and they just glow. Tammie is already a sweet girl with a bubbly personality. I took some quick shots of her at Rim Lake just down the road from her house. Here are a couple of the shots I took. I purchased some parasols online just for this session and I'm so glad I did because they just added a nice touch. I also asked her to be my first SpokesMama. For her participation she gets 15 referral cards with her favorite pose from the session with my logo and information to pass along to friends. She also gets a mini accordian which is perfect for displaying in the home as a conversation piece. And she gets an 8x10 as a gift. She was my first maternity session so I was so happy it was her. I can't wait to photograph her little one when he's born!

Sunday, June 19, 2011

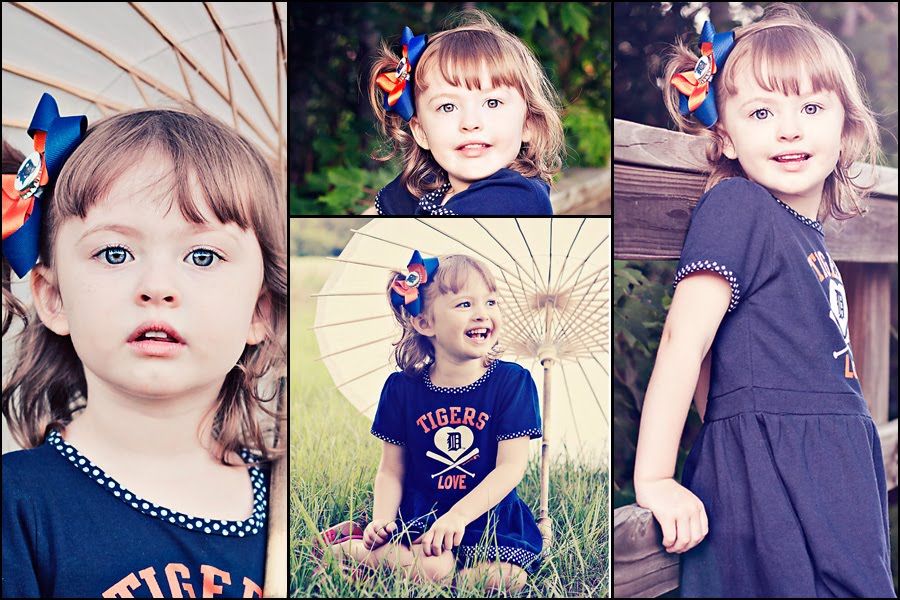
Detroit Fan!

Today I took out my daughter Ava to test out a couple of things. For my birthday my husband bought me a 50mm 1.8 lens. For the price of this lens, it's soooo worth it! All of the photos pictured were shot with it. I also bought some parasols online that were super affordable and I love them! I bought a white one and blue one because I'm doing a maternity shoot for my friend Tammie next weekend. I'm very happy with how the shoot turned out and how the lens performed.
On a personal note, I'm starting Full Sail University on the 27th for digital cinematography. I'm so stoked about learning this. I got my new MacBook Pro in the mail with Final Cut Studio, Adobe photoshop CS5 extended, Fireworks, After Effects and so much more. I can't wait to utilize this new software and make some awesome video. I plan on trying out some fusion photography when I get my T2i. I plan on downloading the magic lantern for it and a glidetrack and a stabalizer. Can't wait!

Wednesday, May 25, 2011

SpokesMAMA program

I need to broaden my client list so I decided to do a new program. It's a referral program for a selected individual that represents my target market very well. It's called SpokesMAMA and it's a free session, accordian mini for display in the home, and 25 referral cards to send to friends and family to help promote the business. I also provide free images for facebook and blogging. It's to help get the name out there as well as provide an incentive at the same time.

Thursday, May 19, 2011

Lifetouch Senior Training


This week was a lot of fun at the studio. We were training for the upcoming senior season so we practiced on each other with different backgrounds and lighting techniques. It also gave me the opportunity to get some business portraits that I've really needed. The thing about photographing everyone else is that you rarely get portraits done of yourself. I added some actions to these portraits to give them a pop. I've mentioned how much I LOVE mcpactions.com and I use their actions in every photograph I edit. For example, all three of these images have the "eye doctor" and "the dentist" actions applied to them to really make the eyes stand out and whiten the teeth. I also used their magic skin action to soften the skin. That's all I really have to do to an image that is good on exposure and lighting. But that's where professional photographer's images have to have that "extra" something to give someone a reason to use their services rather than pick up an awesome point and shoot. Anyway, I'm very happy with the training I got and hope to take some awesome images worthy of winning competitions.

Tuesday, May 17, 2011

Senior Survival Kit

I thought of a really cool gift that I could give seniors who participate in a senior session. I remember when I was a senior I always loved getting freebies, especially when they were nice gifts that I knew I would use. And I'm sure one store that any senior can go into and find something they want is Ulta. So I figured, wouldn't it be nice to create a "senior survival kit" for seniors with products they can use to make their senior year easier. Every senior uses facial products, body washes, and hair care products. Ulta is an awesome store that has all of these things. However, Goldsboro does not have an Ulta so why not kill two birds with one stone. When you book a senior session with me, the day of the session the senior will get their really cool gift! Photography is very competitive and you have to find ways to set yourself a a part.
And there are no limits on creativity with senior sessions. As a matter of fact, I welcome with open arms an awesome creative senior session. A senior session can be anything that reminds the senior of the last four years of their life. It can be a portrait that has your favorite color, your family pet at the time, a really cool hang out that may not be there 20 years from now, the beach, the car you drive that you're really proud of. A senior can even use this session as an opportunity to do a "trash the dress" session with their prom dress from a previous prom. Don't let a little rain get you down! How about some funky rain boots and retro umbrella with a dress? Have fun! I can't wait to experiement with some fusion photography now that my hubbie is buying me a 60D camera body for my b-day. Have some fun with your senior session, the sky's the limit!

Monday, April 25, 2011

Senior Season!

This wonderful Easter weekend I had the pleasure of photographing Laura, a German exchange student staying at my niece's house for the year. As you can see, her beautiful smile is contagious. She was a joy to photograph and we were able to find a nearby vintage car graveyard where I took several shots. The shot to the left was one of my favorites. I used the car window as a frame and I loved the texture which I accentuated with one of my photoshop actions I purchased from www.mcpactions.com. BTW if you want to spice up your images, there are tons of fun and new actions to purchase there and also some freebies. If you would like to see more of the shots from this session, I downloaded them on my facebook fan page, KimJo Photography, go check them out.

Tuesday, April 19, 2011

New advertisement!

This is the front of my new card ad to mail out to potential clients and current clients. I have a bella bebe advertisement specifically for babies and maternity, so this is a separate advertisement designed more for families, couples, and senior portraits. If you haven't noticed on my website, I have packages as well as a la carte. I'm going to start really pushing those because you get more for your money. A la carte is really more for if you really need 2 8x10 portraits instead of 1 and your package only includes 1. I've had a lot of fun shooting some "senior" specific shoots lately. My model Brooke pictured in the advertisement upper left allowed me to get some great shots of her at a local park with a beautiful waterfall in the background. I love how the water creates leading lines to my subject and she pops right out of the image. I was able to experiment with the best lighting and I was very pleased with the results. This type of shot is not typical of a traditional studio. Most traditional studios, especially chain studios, do not offer designer location sessions. As a senior you are missing out if you don't hire a studio that can offer you everything you need and want in your session. If you want to have beach shots, you be able to get that. I have a few "spots" that I use for location sessions, this park is 30 minutes from my house. I love railroad shots and I have a place specifically for "urban" shots. I recently shot a cap and gown session right in my house. For the backdrop I simply clamped black felt I purchased from Michael's to some light stands, had a stool that the subject sat in and shot different angles and her mom was very happy with the final product. I also shot some prom portraits right in the client's home and got it out of the way so that the couple could enjoy their prom night without spending $100 on prom portraits. My fairy portraits will also be under this advertisement. I have everything now except my mushroom and I'm going to build a nice bridge for a prop. Can't wait to have a fairy day!

Friday, March 11, 2011

Working at Lifetouch

I needed some extra cash to buy some new props for my fairy shoot and maybe an alien bees strobe so I looked online and found an opening for a school photographer through Lifetouch Portrait Studios so I applied. I had a good interview and started training at the studio for a week and for the time being I'm working to pay for my fairy props and lights but I'm learning valuable skills in customer service. So far I've worked on cap and gowns, school groups,and school individuals. We set up our equipment, take the pictures, and tear down. It's definitely good experience.

Sunday, January 9, 2011

The Secret


It is now 2011! I can't believe how fast it got here but it's here now and it's time to look to the future. I'm going to talk about something indirectly related to photography, especially if you're in business for yourself and you're struggling, or not struggling. Either way I have a positive message. I was on the message boards for www.nobsphotosuccess.com and I saw a thread entitled "The Secret". Immediately I clicked on it, lol. I guess I was wondering if it was some photography secret that I just had to know. Anyway, when I clicked on it, someone was mentioning how grateful they were for learning about the secret. Ok, what's the secret? I had to know because at this point I felt like somehow in a group of people who knew something and I was the only one who didn't know. There was a link and I clicked on it. It was "The Secret" and I just can't express how inspiring this is, for anyone. I feel so blessed that I found this at the beginning of this year because i really think my life is going to turn around for the better. It's a new mindset of positive thinking. On this website you have to pay to watch the movie and there's a book you can read but I want to pay forward something I found so that you can watch it for free because I feel that everyone should watch this. I even printed out the optimist's creed and put it on my refrigerator so that I can read it everyday. Here is the link http://www.megavideo.com/?v=FWNNJTJY and you need to click on the play button twice. So, how does this relate to photography you ask? I'm going to tell you a short story. I have always been interested in the arts. I finally realized at 28 years old that I want to be a photographer. But I also realized that I want to work for myself and now I realize that it is possible. There are so many things possible with the right mindset! I can lose some extra weight that I've accumulated over the years having children, my family can be prosperous, and I have the capability to love everyone around me. My next book to read after watching this inspiring video is "The Power". I will let you know how it is. www.thesecret.tv/ Once you watch the video check out this site as well. You can print out and watch visualization tools and things to inspire you even more! And please pay it forward as well by sending this to one of your friends or family members!

Wednesday, January 5, 2011

Make Your Own Awesome backdrops!

Well, already this new year has brought some surprises that I was not expecting or hoping for. I made a hard decision to switch schools so that my drive would not be as long and I could borrow student loan money to help start my photography business. I dropped all of my spring classes at RCC and started the process to go to Pitt. Well, my final transcript is still not there and I don't have the money in my pocket to pay for classes so I guess I won't be going to school this semester. I need to focus my energy on getting certified with the help of Sandy Puc's website. So now that I don't have the money I have to figure out how to get it started on a budget. My first purchase will be to get a softbox kit for my vivitar flash since I already have a reflector I just need a stand for it. As much as I would love to go with Photoflex products, it's not in my budget so I will have to go with cowboy studio. I already purchased a wireless trigger kit from them and it has not let me down. Good $23 investment I think ,and it got my flash off camera. They have a softbox, light stand kit for around $50 so I will have to go with that. As far as the backdrops I wanted so bad, I was planning on purchasing a tin wall through robertandrewdesigns.com. If you have the money this website has beautiful props and vivid, creative backdrops. However, this is something I can make myself for hundreds less than what it costs on the website. All you have to do is purchase some faux tin ceiling tiles or styrofoam ceiling tiles with elegant designs and either paint them yourself or buy them already painted with the colors of your choice. Two websites that you can buy these from are www.decorativeceilingtiles.net and www.americantinceilings.com. There are videos that explain how to make your own custom backdrops that are unique and will appeal to your seniors and children. You can buy insulation from your local hardware store and glue the tiles on to make an 8x8 backdrop that will have your customers coming back. It's a cheap alternative that is effective. As soon as I make one I will put a picture on here. I want this business so bad and, light is light no matter how you diffuse it so I am determined I'm going to make this work. If you're in the market to spice up your business with some new colorful backdrops and props here are some websites I recommend: www.designrevolutiononline.com, www.robertandrewdesigns.com, and www.dropitmodern.com.

Sunday, November 28, 2010

Tis the season!

I can't believe it but it's that time of the year again! Everyone in the holiday spirit (or should be) and children getting excited about Santa and Christmas. I took a short break from assignments for school to go over to a friend's house and take some portraits of her beautiful family. Pictured to the left is her daughter looking up at the tree and decorating. For most families, it's a big deal to finally put up the tree and decorate it. It's the sign that's it finally the Christmas holiday. I think that's what holiday portraits should be all about. I went over to their house in their element and shot candids and a few posed. I shot a few on BW film and I can't wait to see how they turn out. It was a nice break from the chaos of getting all of my assignments in for school.
Tuesday my "Word" assignment is due for Chuck's class. We were given a list of words and we had to shoot a picture that immediately demonstrates the word. I picked the word "tight" and the word "loud". For my tight shot, I had my niece pretend to try to put on a tight pair of jeans. For the loud shot I had my son holding his ears while Charlie screamed at him. I have to print those tomorrow. Shooting my depth of field assignment today.
So on that note, I wish everyone happy shooting for the holidays and remember to capture the holidays as they should be: happy, joyful, and loving.

Monday, November 15, 2010

Switching to film? hmmm...maybe


I've been attending RCC for a semester now and one of the great things I've learned about is film photography. I come from the age of digital. Until this program, I had never shot with a film camera other than the throw away kind. I have a canon rebel xsi and I've taken thousands of pictures with it, but there's just something about the magic of shooting with film. Kind of like a family that decides not to find out what the sex of their baby is until it's born. Everytime I processed my negatives and hung them up there was this a-ha! moment and then when I go to the darkroom to print I can see the beauty and detail in each image. I have to SLOW down...a lot to set up the shot I want and decide how I want it to look, meter, and hold my breath because I know that once I click that shutter release I can't just go look at an LCD screen to see if I got the shot or not. It's a done deal. But I love it! I've been checking out film cameras online because I think I may just revert back and appreciate photography as the art it is for a while. I'm looking at the Nikon f100 but I really want the MF of the Mamiya 6 rangefinder. They don't have this camera to check out at school but I have shot with the Mamiya 645, Bronica, and this weekend I had the Mamiya C220. I bought a roll of color film and took my kids out in a field to play with this airplane and just shot. Can't wait to see how those turn out. But I shot a roll of B&W at Charles B Aycock birthplace recently for my portfolio and I'm going to school to print today and finish up an assignment.
The sad part is that I will most likely have to part with this great program at RCC in favor of a closer school like Mount Olive College. The pros to this are that the school is closer which is more practical for my family sharing one vehicle and the program at MOC is visual comm so I will be learning just as much about graphic design, however, no film is used for the photography classes. I just love the look of traditional B&W film and it's so breathtaking and beautiful. I know ECU still has a darkroom but that's still 45 minutes I don't want to drive to go to school. The Nikon f100 is pretty darn cheap on ebay so if I have to I'll go with 35mm since the Mamiya 6 is still expensive, for me anyway. We'll see. I'll post some pics when I print my Aycock photos so you can see the difference. The picture above is one I shot for a "negative space" project. It was shot at Waynesboro Park in Goldsboro.

Saturday, October 23, 2010

The adventure of processing film at home!

This is my first semester at Randolph Community College and I'm majoring in photographic technology with an intended major of portrait studio management. One of the things I love about this program is that we start out learning how to shoot on medium format film cameras and we learned how to process our own film. Since I live 2.5 hours away from school I decided it would be better to buy the supplies to process at home and so far it's working great. I've processed 3 rolls of film so far. I went to Peace Camera in Raleigh and purchased a Paterson Universal Tank with reel, a photographic thermometer, a changing bag, and some hypoclear and wetting agent. The school provided me with the developer D76, stop bath, and fixer. I was nervous at first because it is so time and temperature specific. But that's what I like about doing it at home. I don't feel rushed, I can take my time and do it right the first time without ruining film.
The first thing I did was place my tank, reel, and unprocessed film in the changing bag and zipped the bag close. Inside the bag I unrolled the film and placed it on the reel. Then I placed it in the tank and opened the bag. I poured some presoak in a container and placed the thermometer to get it to 68 degrees and poured it in the tank to sit for 15 minutes. While the film was soaking I poured the developer into its container and temped to 68 degrees. After the pre-soak I poured out the purple kool-aid and set the kitchen timer to 6.5 minutes. I poured in the developer at an angle and tapped the bottom of the tank twice. Then I inverted the container 4 times, tapped the bottom again and let it sit until 30 seconds passed and repeated, then poured the developer out to drain the remaining 15 seconds.
Next, I poured in the stop bath agitating for 15 seconds and then draining for 15 for a total of 30 seconds. I set the timer for 5 minutes and poured the fixer, inverting 4 times and letting it sit for the remaining 30 seconds then repeating. I drained the last 15 seconds.
Once I poured out the fixer I filled the tank with water, inverted the tank 5 times and then drained. I poured in my hypoclear after setting the timer for 2 minutes, agitating for 10 seconds and letting it sit for the remaining 30 seconds. I drained the final 15 seconds.
For my final rinse I poured in the water, inverted 5 times and drained it. Then I refilled it with water and inverted the tank 10 times and drained. Poured in water and inverted 20 times then drained. I poured in some wetting agent and let it sit for 15 seconds and then drained.
Finally, I removed the film from the reel and removed excess water and hung it up to dry in my bathroom. I can't wait to make some prints from my photo safaris at the fair, acid park, and my school assignments!

Thursday, October 7, 2010

Becoming a certified photographer

The competition is getting fierce in the world of photography. With so many self-taught photographers out there, clients expecting top notch work may be more selective about who they choose to take their cherished portraits and events. There are a few ways to make yourself more marketable and more authoritative in your field. I'm going to tell a little bit about what steps I'm taking to have a step up on my competition.
The first thing I did was enroll in a photographic technology program at Randolph Community College. I was very lucky to have such a great well rounded program close by. It starts with the nuts and bolts of photography, starting with the fundamentals and building on that. We have started out with film photography so we learn to slow down and think about what we're shooting, how we're composing it, and we're learning how to process and print our film. We're also learning the design elements that are so important in photography. Anyone can pick up a point and shoot but as a professional you have to learn to exercise your artistic eye and the technical aspects such as aperture and shutter speed. You may not have this kind of program close, but I'm sure your local community college has digital photography classes you can take. Do anything you can to learn to use your camera beyond the automatic and program modes.
Perhaps you already know a lot about photography and you're happy with your work but you want to differentiate yourself from your competition. If that's the case you should become a professional certified photographer. The website is www.certifiedphotographer.com and this goes more in depth about the process and how to get started. There are basically two steps to this process. You can do these steps in any order you wish. You take a written exam and you submit 20 images. These images can not be of the same subject and they must be images taken for clients. As far as the written exam, there are so many resources to help but I think the most valuable right now is www.sandypuctours.com. Right now Sandy has committed to helping 1000 photographers become certified and she is providing a lot of help. Her website provides webinars, flashcards you can download to study, and study groups in your area.
Another way to distinguish yourself is to become an award winning photographer. It helps with advertisement and lets your clients know you are good enough to win print competitions. I live in NC and the PPNC is an incredible resource to help get involved in print competitions, as well as, helping make connections with other photographers in the state. PPA is the nation's resource but I think it's better to get involved more locally.
Hope these suggestions help and that you become certified soon.

Sunday, October 3, 2010

Marketing Yourself as a Photographer

As a student photographer, I'm already looking for ways to get myself and my business "out there" when I graduate. I've already started my website, www.kimjo.smugmug.com and I'm tweaking it to help it rank better. I'm going to Randolph Community College majoring in photographic technology.
Education alone is something that many photographers don't have. Some will probably say that if they're making money as a professional photographer that's all they need but that is not true. Professionals are constantly learning more about their study and passion and want to learn.
I also plan on becoming a certified photographer by the Professional Photographic Certification Commission. If you would like more information on this please visit www.certifiedphotographer.com. Certification sets you a part from others and shows that you have the technical and design skills to produce quality images.
Being a resident in the state of NC, I plan on becoming a member of PPNC(Professional Photographers of NC). This does a few things for photographers. It helps you network with other photographers and will hopefully get you involved in print competitions, which is another thing that is important to set you a part. Become an "award winning" photographer! Can you imagine what that will do for your advertising to be able to add "Award winning photographer" to your business cards and newsletters? It proves that you're competent as a photographer and it assures the client that you're capable of giving them the best quality photographs.
Finally, you need to learn how to effectively market! All of the things mentioned above are great things to add to your resume but now that you have the education and experience you need to get the word out! What good is it to have all these great qualities and not have the customers? I got involved with www.nobsphotosuccess.com and they have helped me out tremendously in understanding marketing and show you all the steps to get your name out there. I joined this site, but they still have a free newsletter that you can receive to see if you like their strategies. It will take some work, but their marketing helps you give that personal touch that is absent from so many marketing skills now. Making the client feel like you know them on a personal level and knowing they're not just a number will keep them coming back and using your services over and over again. I will go into some of these things in more detail in future blogs, but for now check out the sites I mentioned and keep these things in mind. You may not have the time to go back to school for a degree, but you can still become certified and compete in print competitions so make it happen!

Friday, October 1, 2010

How to Choose a Photographer

How to Choose a Photographer

Did your boyfriend just pop the big question? Perhaps you're welcoming a new edition to the family. These are all big moments in your life and you don't want to trust your cherished memories to just anyone.
For example, when my niece got married in Florida she paid for her friend to go and take pictures. When the pictures were ready she wasn't happy. Although it was a beautiful ceremony on the beach, the photos don't translate that.
The last thing you want to do is try to save money on your photographer. What good is it to spend thousands of dollars on a wedding or the family beach house if your photographs are under or overexposed, shadows under the eyes and look like a mud sucking gray color?
Here are some tips when choosing a photographer for your big event.
1. Don't look for a deal- Your photographs are what you have when everything is over and the dust has settled. Every detail is recorded in your pictures and you want them to remind you of the most important events of your life in a positive way. Don't pay your cousin or best friend $25 to save some money. You will regret it later!

2. Do your research- There are probably several photographers in your vicinity and it would benefit you to visit each studio and interview the photographers. Find out about their unique styles, products, and general attitude. You may love someone's work but if you don't like their personality it may be a good idea to find a different photographer with a similar style. Another thing to point out is what will happen if the photographer gets sick. Do they have a backup photographer with the same credentials? Do they have a second shooter, especially for weddings? Do they go the extra mile to provide you with as much information as possible? A good photographer will have packets with samples and pricing.

3. Education/Experience- Many photographers are self taught. Photographers who take the extra steps to get a degree or become certified photographers are showing their dedication and passion to the art. For example, I am currently attending Randolph Community College for their program in photographic technology. This program requires an internship and all of the assignments are hands on learning. I also plan on taking the exam to become a certified photographer. Randolph is an accredited photography program and we are learning all of the up and coming techniques in digital. However, we learn the fundamentals of photography through film with medium format. How many photographers can say that?

4. Use student photographers- If you absolutely can not afford the photographer you want, the next best thing is a student photographer. A student photographer usually has a cheaper rate they charge because they are still learning, but many times they know more than enough to capture beautiful images for your big day. If you have to choose someone with no experience other than a point and shoot camera over a student, choose the student. Furthermore, a good relationship with a student photographer usually means free portraits for you in the future because a student always needs models. Many times they will shoot your engagement for free if you hire them for a wedding. In other words, you will get deals that you normally would not with an expensive photographer.

Getting in the swing of things!

I'm finally adjusting to the schedule at Randolph Community and how this photography program is going to work. This week we're learning how to use our light meters that were required for the class. Our professor recommended the Sekonic L308S model so I purchased one from Peace Camera in Raleigh. I tested it on a senior shoot so I'm becoming more familiar with it and Bill went over the incident and reflective modes. I played around a little bit with the flash mode on the shoot because I'm a member of www.nobsphotosuccess.com and I was practicing something mentioned there. I took the ambient reading of the subject and actually added a stop to that reading and matched my off camera flash to that. It darkened the background and really made the girl pop from the picture. This weekend I have to work some more on my gray card assignment. I stayed in the dark room from 10am-7pm Wednesday night and got all of my prints done so now I have to cut them down and arrange them on the 11x14 mat board. As for now I checked out a Mamiya medium format 645 from school to shoot Chuck's assignment "Lines". Our county fair is here this week so I'm gonna see what kind of lines I can find at the fair to shoot.